Saturday, November 16, 2013

Sitecore MVP Summit Day 2

After breakfast Pieter Brinkmanstarted the conference off with a welcome.


Next was the Keynote featuring Michael and Lars.

An introduction to Who's Who at Sitecore


Out the front of the hotel waiting for the bus for an amazing boat tour on the Venetian Lady

The Venetian Lady was beautiful.


 A Stellar view of the city from the top deck of the Venetian Lady


Roll your own cigars :)

Really good Rum


On the beach preparing for the group photo
 Look at that beach
A conference could not be complete without some John West meme :) 


Everyone I spoke to had an amazing time, thanks Pieter and Marissa for organizing a stellar event.


Thursday, November 14, 2013

Sitecore MVP Summit 2013 - Day 1

Last night was an amazing reception, Pieter and Marissa provided a warm welcome and some amazing shwag.


I immediately put the mobile card holder on my phone and made use of it a lot at the MVP Reception at the James Royal Palm.

We were greeted by strong winds and rains but the friendly staff were on hand with large umbrellas to welcome us in. 


The area has some nice buildings


On Lincoln Road, we found a really good burger place


I got to meet all the Sitecore MVPs from Japan.


The Sitecore Pillow was on hand and brought some of his relatives.  I would love provide a home for one of the to Three Point Turn in Toronto Canada.

Thanks Pieter and Marissa for an amazing first day.  I look forward to breakfast, the presentations today and the evening on the Venetian Lady.  I will post again about this on Day 2.


Friday, November 1, 2013

jQuery not firing after Microsoft AJAX Update Panel Postback - or why pageload is better than document.ready

I ran into an interesting issue today while using jQuery in an AJAX Panel.  It appears that existing items that were there on original page load were triggering but any new ones after an ajax postback were not.  I did some searching and came across the issue.

It appears that document ready and pageload are not the same  document.ready only loads once when the page is loaded but not on all the AJAX page loads.  The solution is to use function pageLoad() and do your calls within there.

However, this leads to another problem.  If you simply use function pageLoad() then you can only call it once on your page.  There is a solution to this as well.  This article explains how to make ASP.NET AJAX Multiple pageload functions possible through simply using

<script type="text/javascript">

    Sys.Application.add_load(function () {
     // Your Code here
   }

</script>

If you have any tips, tricks or resources you would like to share with the guild please email them to me at chris.williams@threepointturn.com


Wednesday, October 9, 2013

Sitecore Users Virtual Summit - October 15 - 16, 2013

The Sitecore Users Virtual Summit is an awesome 24 hour summit happening online on October 15-16 You can check out the schedule. Its online and running 24 hours.

You can tune in for the presentations you want. Check out the schedule Some key ones to check out:

There are two presentations on Active Commerce by Nick Wesselman. CTO at Active Commerce, Sitecore MVP.


One on Automated Testing


One on SheerUI


There are a couple on DMS:


Howard Kim is presenting.  Looking forward to that.


The plus to this Summit is you don't need to travel, you can tune in from anywhere. The presenters are high caliber as are the topics.

I look forward to seeing everyone online taking part in these presentations.

Saturday, October 5, 2013

QuickStart: Deciding what Data Goes Where


One of the biggest factors in a successful Sitecore implementation is determining where data is stored.

These storage locations can be grouped into four types:

a) Sitecore Content Tree
b) Local Data Sources
c) Enterprise Data Sources
d) External Data Sources

The initial tendancy is to place everything in the content tree especially if you are not working with Enterprise Data Sources or External Data Sources.


What To Store In The Content Tree
---------------------------------

The Sitecore Content Tree is a good place to store data that is easily placed in a hierarchy of 1 to 1 or 1 to many item relationships.
It is NOT good at storing data that is tightly related to many other items.  It is also not as great a storing large volumes of direct children unless you take

advantage of such modules as Item Buckets.

The key question to ask when considering placing content in the content tree or media library is:

* Is this content only used by Sitecore or is it used by another application such as CRM, SAP, Sharepoint or some other system?
If this content is only used by sitecore in most cases this data should live in the Sitecore Content Tree, or Media Library.
There are some exceptions such as User Management/Security which may be only used by Sitecore but does not make sense to be in the content tree or media

library.  User Management is discussed in another Blog Article.

* Does this content need to be editable by content editors or is the data edited in external systems or only by users of the website?
If content editors will not be editing this content then the additional overhead would not necessarily be worth it and you are probably better served storing
it in the external system, additional SQL Server database tables, or in another data source.

* Other than for reporting, is this data read by any other website components?
If the data is only being collected by sitecore and then displayed in a report or used by the rules engine, you don't really need to store it in the content

tree.  Storing it in an external table would allow data to be queried more easily for reports or dumped to external reporting applications.

Here are some examples of data to store in the Content Tree:


* Page Hierarchy: By this I mean the website root node and all the pages used to build your navigation.  It makes sense to store this as it helps
  structure your content.

* Static Page Content: This is content related directly to a page.  It may be as simple as a title and a description and whether it is included in sub navigation.

* Resource Strings: These are all the field labels, static descriptions, help messages that are straight text with no formatting.

* General Site Settings: These are settings either related to the entire sitecore instance or per site. These are specifically setting that need to be edited by the

end user.  These settings are instance-wide and do not change often then you would want to place these in the .config files.
 
* Media Items such as images, PDF, Word Documents, PowerPoints, etc should be stored in the media library.

* Semi-static lookup lists.  This includes country lists, departments, regions, currencies, etc.

* Generic content items:  These are content items that will be updated, possibly need approval and then get published.  They can be shared across many pages.
An example would be a an article.  It may exist in an article page, but also be featured on a front page, or in a content rotator.  This single piece of

content would have all the information in one place and be referenced on the multiple pages.


Some examples of what NOT To Store in The Content Tree
------------------------------------------------------

* User Information such as logins, roles etc.

* Reporting Data and Logs are best stored in a local data source as this data will be written once and then reported on.  End users will NOT be editing this data.

* Product lists, e-commerce purchase transactions.


In an external database directly accessed via the Sitecore Web Application (three-tiered of course).  This would also include any imports and extracts
c) Cloud/external data sources (eg. via web services, Sitecore Connectors, etc)


QuickStart: Securing Sitecore

Sitecore is built on the standard .NET Membership Provider.  As such developers will be familiar with how it functions under the hood as far as creating user, profiles and roles.  However, it can become a little more complex when dealing with securing content.  Content needs to be viewed and edited by users who log into the Sitecore Admin, whether it be the page editor, content editor, or media library.  As well, content needs to be viewed and edited by users accessing the public website.  This can be confusing especially if you have not mapped out a roles matrix first.  This Quickstart will help walk you through the steps you need to ensure you have a secure sitecore installation.

Ensure before going to Production that you follow the checklist at the end of this blog post to ensure you have secured your Sitecore Installation.

1) Develop a role matrix

Roles are used to determine which of people will be responsible for reading/editing/publishing content.  Depending on your implementation, certain people may only be able to accessing certain content.
Some may access the page editor, while others need the content editor, and still others need the desktop.  
  
 It is very tempting especially when working with small companies to map users to their access.  Joe is the one uploading pdf files and editing content. Mark will will be the one proof-reading the content and then publishing it.  Rather, Joe is a content editor and Mark is a publisher.  So your role matrix would be:

Role
-----
Admin
ContentEditor
Publisher

RolePermissions
-----------------
/sitecore/content             Admin                          Read/Write/Publish/Admin/Delete
/sitecore/content             ContentEditor               Read/Write/Publish

User Roles
------------
Joe                     ContentEditor
Mark                 Publisher


Production Promotion Security Checklist

1) Important Sitecore provides a default “Admin” user which has unrestricted access. By default, this user has the password “b” (lower case, single letter). You should change the password associated with this account and store the password in a secure location.
2) Ensure /Sitecore is in the robots.txt file
3) Ensure you register your site with webtools and exclude this path there as well.
4) Log in as a user of each role and double check that you cannot read/edit specific content you have secured.  The access viewer can help ensure you see a sea of red.


Quickstart: creating a sitecore package

Although the preferred method for deployment is through Hedgehog, sometimes it it necessary to build a sitecore package to deploy or share your sitecore modules.   If you are deploying a build and You will want to split your packages up to avoid reference issues.  I tend to seperate them into 4 packages: data templates, media library, sublayouts/layouts and content tree.

Note: if you run into conflict issues you may have to break the content package into pages and content then deploy content package before pages.

If you are building a package for a module then you will be including everything in one package.  This would include dll and other physical files.  If you are including config changes always include them in an includes config and dont overwrite the existing config.

STEPS

1 open the browser and navigate to the sitecore admin

2 ensure you click options to and select desktop

3 enter your username and password and login

4 click on the Sitecore menu and click on developer tools

5 click on package designer

6 click on new to create a new package

7 give the package a name

8 save the package

9 enter a name to save the package xml

10 in the menu select static items to add items to your package.

NOTE: although tempting avoid using dynamic packages as you may unintentionally miss content items needed or include more items than you need.

11. Click on the item you need and if necessary choose add subitems.

12 if there are more items in the group add them the same way.

12 click next and enter a name for the items.

13 save the package

14 generate the package

15 once generated click on the globe to download it

When you are ready to deploy the package check out the quickstart on how to install a package using Sitecore ROCKS or how to install a package if Rocks is not installed.


Sitecore QuickStart: Create Visual Studio Project

In Sitecore Training you learned how to create a Visual Studio Project for your Sitecore Instance.  This is an awesome start for your first project, however as you start to share functionality across projects, create your own modules, or start working in a multiple sites per instance scenario, you may need multiple projects per instance.

In the solutions I have architected, I generally will leave the Sitecore instance as is and create projects in their own projects folder.  These projects can then be deployed to the sitecore instance as needed by copying over the dll and any layouts, sublayouts etc.  Architecting the Content Tree and Physical Folders will be in a future QuickStart.

In this blog article, I will be creating a Visual Studio Project that could be used for a single site within the Sitecore Instance.

Step 1: Create a Visual Studio Class Library.

Click on the File Menu and Click New and then Project 


On the left panel ensure you have clicked Windows then on the right click Class Library.  Name your project and directory to store your project.

Step 2: Add References To Sitecore Kernel and Sitecore Logging

In the Solution Explorer Panel, Right click on References then click on Add Reference...

Click on the browse tab and navigate to the bin folder of your sitecore instance.  Select the Sitecore Kernel and Sitecore Logging DLLs.  Alternatively you could place these dlls in a shared folder.  Click OK to Add References.


Add References to your project for System.Web 


Step 3: Create folders for your Sitecore Components
NOTE: This is a very basic folder structure.  Your project may have a more sophisticated structure to represent your solution. However the concept of deployment on build is the same.


STEP 4: Add Build Events

Right click on your project and click on properties


Click on Build Events

In the Post-build events command line paste the following.  

xcopy "$(ProjectDir)Layouts" "C:\inetpub\wwwroot\SitecoreQuickStart\Website\Layouts" /s /I /y
xcopy "$(ProjectDir)Renderings" "C:\inetpub\wwwroot\SitecoreQuickStart\Website\Renderings" /s /I /y
xcopy "$(ProjectDir)Sublayouts" "C:\inetpub\wwwroot\SitecoreQuickStart\Website\Sublayouts" /s /I /y
xcopy "$(ProjectDir)bin\debug\SitecoreQuickStart*.pdb" "C:\inetpub\wwwroot\SitecoreQuickStart\Website\bin" /s /I /y
xcopy "$(ProjectDir)bin\debug\SitecoreQuickStart*.dll" "C:\inetpub\wwwroot\SitecoreQuickStart\Website\bin" /s /I /y

NOTE: Change SitecoreQuickStart to your project name.  You may need to add more dlls to copy, however do not be tempted to do a *.dll as you may end up overwriting other versions of dlls in the Sitecore Instance.  It is better practice to only copy over the dlls you require.  Also, we are copying the Layouts folder to the Sitecore Layouts folder directory.  For larger projects it is better to create subfolders beneath the layouts folder unless the Layouts are needed for Sitecore Admin Applications, but that will be discussed in a future post on creating Sitecore Admin Applications.

STEP 5: Compile Your Solution

From the Build Menu Choose to Build Solution.  Once completed it should have copied your Sitecore Components to the Sitecore Instance or reported errors in the error list.

Now that your Sitecore Project is set up, the next step is to create your Sitecore Components in the Sitecore Content Tree.


Sitecore How-To: Set the Data Source Property of a Sublayout

The Data Source property of a Sublayout is used when the sublayout needs to use a content item other than the current item.

For example, you may have a landing page with various callouts to other content. These content items would exist in other parts of the tree. For these callout Sublayouts you would not want them accessing the current page item, you would want them pointing at another object that would store the callout title, image and link.

Here are the steps to set the data source on a sublayout on a page.
  1. Login To Sitecore and open the content editor
  2. Navigate to the page you want to edit
  3. Click on Presentation -> Details in the top menu
  4. In the Details Panel click on Edit
  5. Click on Controls to see the list of sublayouts
  6. Click on the Sublayout you want to change the data source for
  7. Click on the data source field. You can either manually enter the path or click browse to choose the content path from the tree dialog
  8. Click ok to save
  9. Click ok to close all the other dialogs


Friday, September 13, 2013

Toronto Sitecore User Group on DMS

The Toronto Sitecore Technical User Group is on September 25, 2013 at EQ Works.

For this meeting we have used http://launchsitecore.net as a starting point and made a few changes to the website. We would appreciate it if you could hit http://tsug.nonlinear.ca to generate some DMS/personalization data.

 If you are able to attend please register at: Sitecore User Group Registration

Wednesday, August 28, 2013

Sitecore 7 Initial Release Now Available


This is very exciting news for a lot of reasons.  First of all, my new laptop is running Windows 8 so I was forced to run Sitecore 6.6 on a VM on my laptop rather than natively.  

Hello Sitecore Enthusiast!

Sitecore is pleased to announce the availability of Sitecore 7. Sitecore can scale to massive amounts of content, and allow users to search, filter and target that content in more sophisticated ways than ever before.
 
Sitecore 7.0 rev. 130424 Major Features and Highlights:
  • Item Buckets for large scale storage of content without a tree structure
  • Faceted Search
  • Tagging and Bulk Operations
  • Boosting Rules
  • New Search Screens for content authors in the Content Editor, Page Editor, and in many dialog boxes.
  • LINQ to Provider
  • Datasource Queries and GUID/LinkDatabase Datasources
  • DocumentMapping 
  • A new Sitecore.ContentSearch namespace that contains new indexing and search APIs.
  • Support for .NET 4.5
Support for running Sitecore on Windows Server 2012 and Windows 8.  

Saturday, June 29, 2013

Sitecore How-To: Sitecore Country and Region Dropdowns

We had a couple people in the Guild ask about country and region DropDownLists so thought Dennis Augustine and I thought we would write an article on it.  

Problem: In our application we require a country and region picker.  When someone chooses a company we need to filter the region picker.

Solution: This can be accomplished by adding two DropDownList controls to your SubLayout. Call one ddlCountry and the other ddlRegion.  

In the content tree under a shared lookup area create a folder called "Country"  under this folder add the countries with key as country code and phrase as country name.  Next under each country create a folder called "Regions" store all the regions in this folder.  I use DictionaryEntry as my Sitecore Data Template for the country and regions.

On Page_load you would call GetCountries() and assign it to the ddlCountries.DataSource Property.

    protected override void OnLoad(EventArgs e)
    {
       ddlCountry.DataSource = GetCountries(); 
       ddlCountry.DataValueField = "Key"; 
       ddlCountry.DataTextField = "Phrase"; 
       ddlCountry.DataBind(); 
   }

Next trap the change in country using the following event:

protected void ddlCountry_SelectedIndexChanged(object sender, EventArgs e)
    {
            ddlRegion.DataSource = GetRegions(ddlCountry.SelectedValue); 
            ddlRegion.DataValueField = "Key"; 
            ddlRegion.DataTextField = "Phrase";  
           ddlRegion.DataBind(); 
    }

Next add the following code to the sublayout. Ideally later you would store these in a library for use late in other parts of your code. Also note that you would need to change "SiteSettings.LookupPath" to the path where you are storing your countries in the tree.  This setting occurs a couple times in my code below.

///<summary> 
/// Getting children items by parent item path 
///</summary> 
/// <param name="itemPath"></param> 
/// <returns>List<LookupItem></returns> 
public static List<LookupItem> GetLookupItemChildren(string itemPath) 

Item item = Sitecore.Context.Database.Items[itemPath]; 
List<LookupItem> lst = new List<LookupItem>(); 

if (item != null) 

foreach (Item child in item.Children) 

lst.Add( new LookupItem(child["Key"], child["Phrase"],child["AlternatePhrase"])); 


return lst; 


///<summary> 
/// Getting Countries by Countries 
///</summary> 
public static List<LookupItem> GetCountries() 

return Lookups.GetLookupItemChildren(SiteSettings.LookupsPath + "/Country"); 


///<summary> 
/// Getting Regions By Country KEY 
///</summary> 
public static List<LookupItem> GetRegions(string countryKey) 

Item item = Lookups.GetItemByKey(SiteSettings.LookupsPath + "/Country", countryKey);
return Lookups.GetLookupItemChildren(SiteSettings.LookupsPath + "/Country/" + item.Name + "/Regions"); 


In Sitecore 7 you can replace these item lookups with LINQ statement.

Dennis Augustine has now created and uploaded the Country Region Dropdown Sitecore Module based on the blog post and it is now available in the Sitecore MarketPlace as a Development Accelerator.

If you have any questions or any tips, tricks or resources you would like to share with the Guild please email me at chris.williams@threepointturn.com or dennis.augustine@threepointturn.com 

Sunday, June 9, 2013

Google Chrome and the 301 Redirect Cache or Why are my 301 Redirects not hitting my server

301 Redirects are important to maintain search rankings and help users with browser bookmarks still find the right location on your site.
                 
This article helps you build your own 301 redirect handler for Sitecore: Create the ultimate 301 Redirect Handler for Sitecore

PROBLEM: Recently while building it myself I found an interesting but/feature of chrome.  When I was debugging my 301 redirect handler the first time I hit the URL it hit my breakpoint and I could debug the update however when I hit it again it redirected without hitting my handler. It turns out this is a feature of chrome.  Since the 301 is a permanent redirect, Chrome remembers the redirect and caches it.
Here is an article that explains it more: Google Chrome Caches 301 Redirects

SOLUTION: There are actually two possible solutions:
  1. Debug in Internet Explorer and FireFox and once working use Chrome once to ensure it redirects.
  2. Chrome has a way of turning this feature off How Can I Make Chrome Stop Caching Redirects
Hope it helps someone else in the Guild avoid the same issue.

If you have a tip, trick or resource you would like to share with the guild please email me at chris.williams@threepointturn.com

Tuesday, June 4, 2013

Toronto Sitecore User Group June 19,2013 will be be DMS 101

If you are in the Toronto area on June 19th, you may wish to register for the Toronto Sitecore User Group.
The topic will be DMS 101.  

Register at: http://toronto-sitecore-user-group.eventbrite.ca/#

Look forward to seeing the Guild Members there.

Friday, May 24, 2013

Read, Watch, Create now indexing Sitecore videos on YouTube

Read, Watch, Create have now started indexing youtube specifically for technical topic videos related to Microsoft Project, TFS, Sharepoint, Dynamics CRM and Sitecore.  They are hoping to do the same for channel 9 and other video sources.

If anyone knows any good feeds for channel 9 or other video sources hopefully rss or atom please email them to chrisw_88@hotmail.com

Thursday, April 18, 2013

New England Sitecore User Group presenting Responsive Design

This should be a really good presentation.  If you are in the Boston Area you should check it out.

Register via meetup for the Sitecore User Group New England


The April New England Sitecore User Group will feature a panel presentation and discussion from ISITE Design’s battle-tested User Experience and Sitecore Development teams that explore the many considerations that go into planning, designing and developing responsive and mobile-friendly Sitecore experiences.
The teams will look at real-world projects with example deliverables, code and approaches for a variety of scenarios. We’ll look at trade-offs in the development processes, approaches to adaptive vs. responsive and the experience-based planning and content strategy necessary for success. Rock-star Sitecore developers are only part of the equation when it comes to making responsive design work with Sitecore.


I hope the slides or a youtube of the presentation will be available.

Tuesday, April 16, 2013

Software is eating the mall? It is happening now. Are you ready for it?


Mall traffic has been dropping.  This has been especially noticeable during the Pre-Holiday Season.  The volume of Black Friday and Cyber Mondays have been constant.  I am still getting Cyber Monday newsletters and its April.

The latest article on Tech Crunch describes this in more detail.

Software is eating the Mall

The divide is growing between stores that have online presence and e-commerce and those who do not.  It is not as complex as it seems.

Sitecore and Active Commerce are a great way to build a flexible yet simple solution especially if you are a large business needing integration with back end systems for inventory control and online purchasing.

Small business needing a presence on a budget can implement simple solutions using open-source or more affordable CMS solutions with PayPal Integration.

Finding the right partner can make all the difference.

Contact me at chris.williams@threepointturn.com for more information.


Friday, April 12, 2013

Install A Sitecore Package From Sitecore Rocks

If you are looking to upload a package using Sitecore Rocks Visual Studio Plug-In you can do so by:

1)  Opening Visual Studio, clicking on SITECORE menu option.  
2) Click on Sitecore Explorer

 3) Click on the connection you want to install the package on.  If not connected then connect to it.  If connected choose Manage Packages.


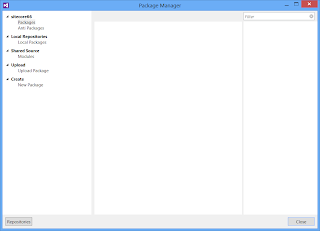
4) In here you can create a package, upload a package, prepare anti-packages etc.

The anti-package feature is one of the most useful.

For those using commandly, you would use the Manage Package task


Monday, April 1, 2013

Installing Sitecore on Windows 8

If you are installing Sitecore on Windows 8 you may get the following error message.

HTTP Error 500.19 - Internal Server Error

The requested page cannot be accessed because the related configuration data for the page is invalid.


Config Source:

 3337:     </modules>
 3338:     <handlers>
 3339:       <remove name="WebServiceHandlerFactory-Integrated" />

See the sample screen shot below:


There are few things to check that may resolve this issue:

1) Check the web.config file in the sitecore website directory for


Check this in the web.config and change overrideModeDefault from Deny to Allow.
<configSections>
  <sectionGroup name="system.webServer">
    <section name="handlers" overrideModeDefault="Deny" /> 

2) Open up IIS and click on the IIS Root Usually your computer name.  When you do you can click on Feature Delegation and set Handler Mapping to Read/Write.  You may need to do the same for Modules.


3) If this does not work then ASP.NET is not registered properly with IIS.  

NOTE: Executing the usual aspnet_regiis -i may not solve this issue on Windows 8.  

On Windows 8 this command now tells you to use Control Panel's Turn Windows Features On/Off. It's IIS\World Wide Web Services\Application Development Features\ASP.NET 4.5


Thursday, March 14, 2013

Toronto Sitecore User Group - April 3 and NLC

The next Toronto Sitecore Users Group April 3 at Non-Linear Creations.
Register Here

Look forward to seeing you there :)

Tuesday, March 12, 2013

QuickStart: Resource Strings

When planning the Sitecore Content Tree Architecture it makes sense to place some content on a page.  Other times it makes sense to create Generic Content items that would store blocks of content in a shared location.  This content could be used across pages.  Other times there are content items such as Form Labels, static text for instructions.  These need translations, but placing the potentially thousands of them in the generic content folder would make it more difficult to manage.

The alternative is to create a folder underneath each site in a Multi-Site solution called ResourceStrings.
Under this folder you can arrange your resource strings by SubLayout name and/or whichever folder structure makes sense to make them easier to find.

If you use a fast query to find them then as long as the resource string name is unique you can place them wherever you want or reorganize them later as you please.

        public static string Translate(string key)
        {
            string itemPath = "FAST_" + Context.Language + "_" + Context.Site.ContentStartPath + "/ResourceStrings//*[@Key = '" + key + "']";


            if (CacheManager.GetData(itemPath) != null)
            {
                return CacheManager.GetData(itemPath) as string;
            }

            string result = string.Empty;

            Sitecore.Data.Items.Item[] dictionaryItems = Sitecore.Context.Database.
                    SelectItems("fast:" + Sitecore.Context.Site.ContentStartPath + "/ResourceStrings//*[@Key = '" + key + "']");

            if (dictionaryItems != null && dictionaryItems.Length > 0)
            {
                // bad entry should fail gracefully.
                try
                {
                    result = dictionaryItems[0].Fields["Phrase"].Value;
                }
                catch
                {
                    result = string.Empty;
                }
            }            
            CacheManager.Add(itemPath, result, CacheItemPriority.Normal, null, new SlidingTime(TimeSpan.FromSeconds(SiteSettings.ItemCacheInSeconds)));

            return result;
        }

Note that this example uses CacheManager.  This is simply the Microsoft Practices Cache Manager.

In order to support the content editor you would need to wrap the controls you are using to display them in sc:editframe I am actually working on a QuickStart Package that would include a series of controls that loosely wrap the standard Sitecore and .NET controls with the ability to supply a resource string.

The Resource Strings Module is now available in the Sitecore Marketplace with full source code.
This should help you get started.  If you are using Sitecore 7 you may want to take advantage of LINQ in Sitecore over FAST to make the code more readable and to piggy back on any optimizations Sitecore makes in the LINQ Provider.

If you have any tips, tricks or resources you want to share with the Guild or simply have a Sitecore question email me at sitecoreguild@outlook.com or chris.williams@threepointturn.com

Sunday, March 10, 2013

QuickStart: Installing Sitecore Packages Via the Sitecore Admin

Sitecore Rocks is an amazing tool that allows you to do a large amount of tasks from Visual Studio.  In the last article about Creating a Sitecore Instance Using Sitecore Rocks that we can install Sitecore Packages right from inside Visual Studio.  There is also a Product from Hedgehog called Team Development that will simplify the deployment of your solution.  However, sometimes you cannot use Sitecore Rocks to install Sitecore Packages or Hedgehog's Team Development for Deployment either for Security reasons or some other good reason.  If this happens, here is an alternative means to install a Sitecore Package.

Step 1: Open the browser and navigate to {website root}/sitecore/login
Make sure you click on options to show login options and click on desktop.  Enter the username and password and click login


Sometimes when you click login you may get this message, "Access to the path 'c:\inetpub\wwwroot\sitecorequickstarts\website\sitecore\shell\applications\debug' is denied.".  The solution is to go to open Windows Explorer and navigate to the project directory (eg. c:\inetpub\wwwroot\sitecorequickstarts) and right click.  Click on properties. There will be a user called IIS_IUSR_{something}  Ensure this user has full control of the site and click apply.


Step 2: If you have access to the server Sitecore Folder you can save yourself some time. Sitecore Packages are stored in the data\packages folder underneath your Sitecore Instance. eg.  c:\inetpub\wwwroot\sitecorequickstart\data\packages
You can copy all your packages to this folder using windows explorer.  This will avoid possible upload issues with the browser.  If you have copied the packages then you can bypass all the upload steps and go directly to Step 12.

Step 3: Click on the Sitecore menu then click on Development Tools then Installation Wizard.


Step 4: When the wizard comes up click next


Step 5: If you copied all the packages to the package folder you can skip to Step 11.
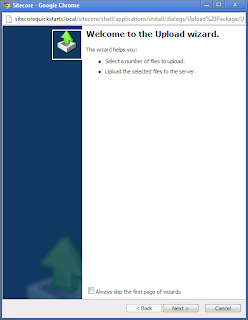
If you have not uploaded the package yet then click upload.  This will launch the upload wizard. 


Step 6: Click next


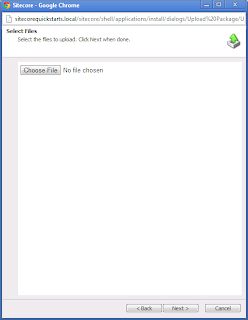
Step 7: Click on Choose File


Step 8: Choose the package to upload and click OK


Step 9: You will see your package listed.  If you have more packages you could choose to pick additional files.  When done click next.


Step 10: If you are re-uploading any packages then ensure you check overwrite existing files and click next.


Step 11: The package gets uploaded and then tells you its done.  Click Finish.


Step 12: Click on browse


Step 13: Select the package you wish to install and click open


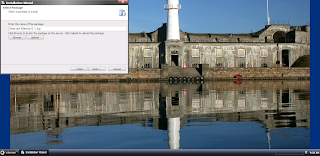
Step 14: You will see the name of your package in the textbox click next


Step 14: Sitecore will provide you with information to confirm its the right package.  If it looks right click Install.


Step 15: Sitecore will install the content tree and physical files.


Step 16: If this is a new package it will probably install without prompt, however if this is an update you may get prompted for additional decisions on how to deploy the package.  If the install starts but then the screen goes grey and you get nothing. Possibly popup blockers are turned on.  In chrome that is in the top right corner by the address bar.


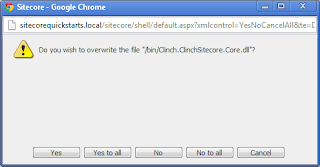
You may be prompted to replace physical files.  Choose yes or no based on the file being overwritten.


Very important: if you are prompted with the following dialog read the choices carefully.  In most cases it is best to choose the Merge radio button and merge from the drop down.   Sometimes this is not the case.  Remember overwriting an item replaces the entire item and children in the tree.  Thus if you have not included all children in your package existing children will be lost.  I remember on my first production deployment a co-worker had to update the site root item and created a package for that item.  We learned he hard way when we deployed the package and hit overwrite.  Luckily we had a backup copy of the Sitecore Databases.


Step 17: After Sitecore has completed installation of the package you will be prompted to restart Sitecore Client and or Sitecore Server.  In most cases a Sitecore Client Restart is fine.  If you require a sitecor Server Restart, then the provider of the package will probably notify you.


Sitecore Packages can make it really easy to install new components but extra care needs to be taken especially with content tree updates as it is really easy to accidentally remove or overwrite existing values.
I highly recommend that you take a look at Hedgehog Team Development for your deployment needs but it is nice to know you have an alternative to lean on when the need arises.

If you have any suggestions for a QuickStart or a tip, trick or resource that would help someone starting out with Sitecore, please email them to me at sitecoreguild@outlook.com